My introduction to defocus film photography came not from 35mm cameras as I'd been shooting those for years, but from the early days of the digital revolution. An online discussion on a well-known photography forum - it must have been around 2002 - demonstrated how to simulate some of the artefacts of early pictorial photography, for example soft-focus and vignetting, by using proprietary software. This had two primary effects on the image: firstly to centre any lens sharpness on the most important area of the subject, and secondly to modify the tonality from the frame towards the centre.
Interesting work, sure enough, but I wondered how the results from several hundred of dollars worth of software would compare with making a regular pinhole camera for a couple of bucks. With a pinhole as small as maybe 0.3mm the light enters from an extreme angle at the edges and corners of the frame, darkening them, and of course everything is just slightly in focus throughout.
The pinhole had legs, but as one thing leads to another I then began looking at lenses, or rather the history of lenses, and considered the options. I could buy old lenses, but there didn't seem much point in attempting to replicate the results of the Victorian and Edwardian eras, and while portrait Petzval lenses are interesting they tend to be expensive. I could try magnifying lenses, spectacle lenses, or even random, odd pieces of glass, though looking around I discovered that quite a few photographers were already busy with this approach and producing some quite remarkable results.
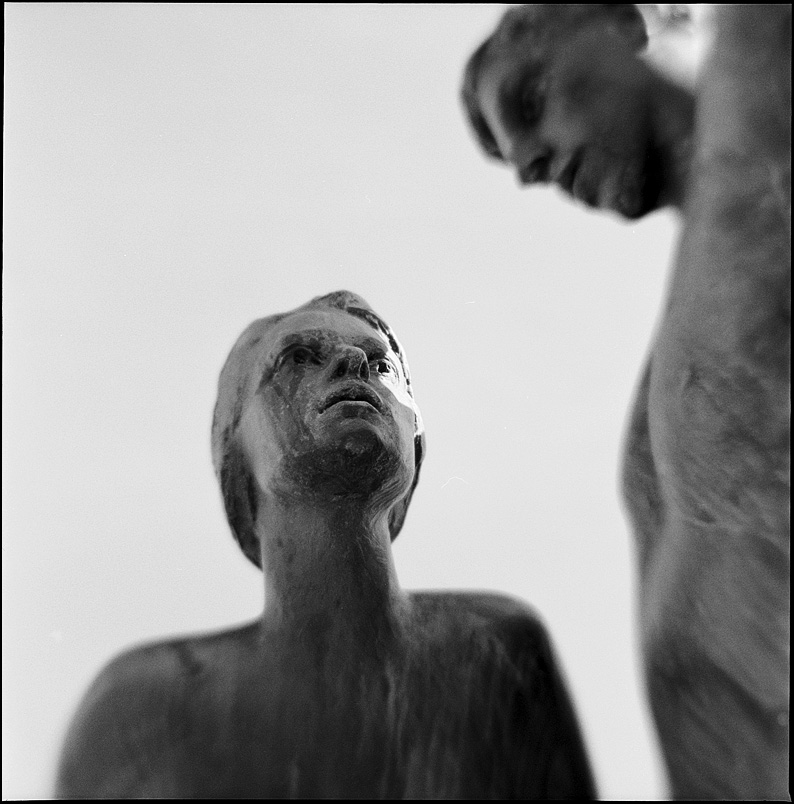
Using a large format camera helped me identify what I was looking for – selective defocus. The movements of tilt and swing push and pull the lens away from the conventional parallel with the film plane, allowing the photographer to isolate just those elements of the subject that they want to keep in high relief. Anything else can be abandoned to a softer blur.
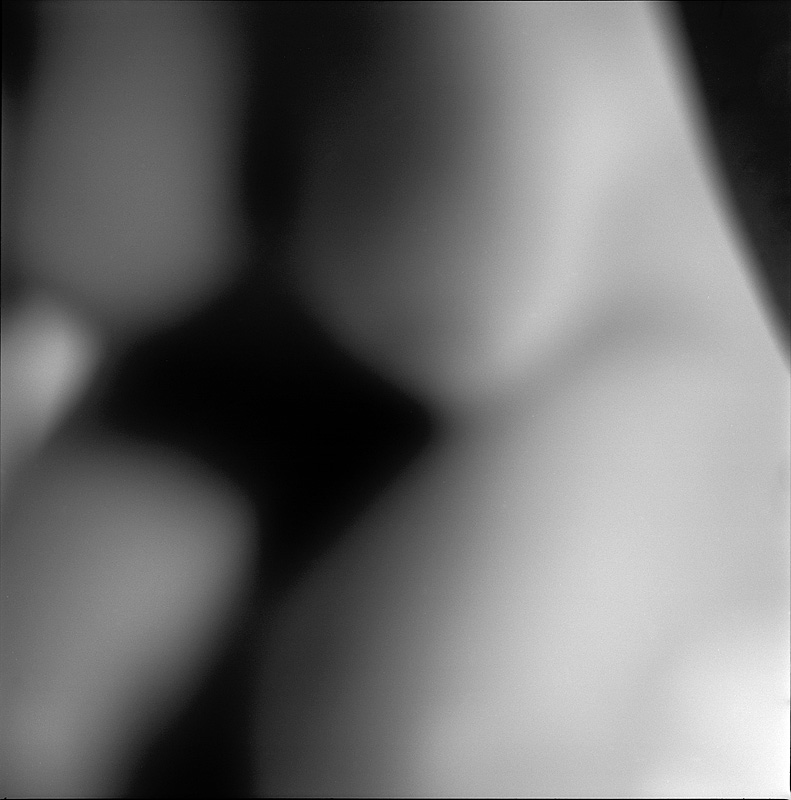
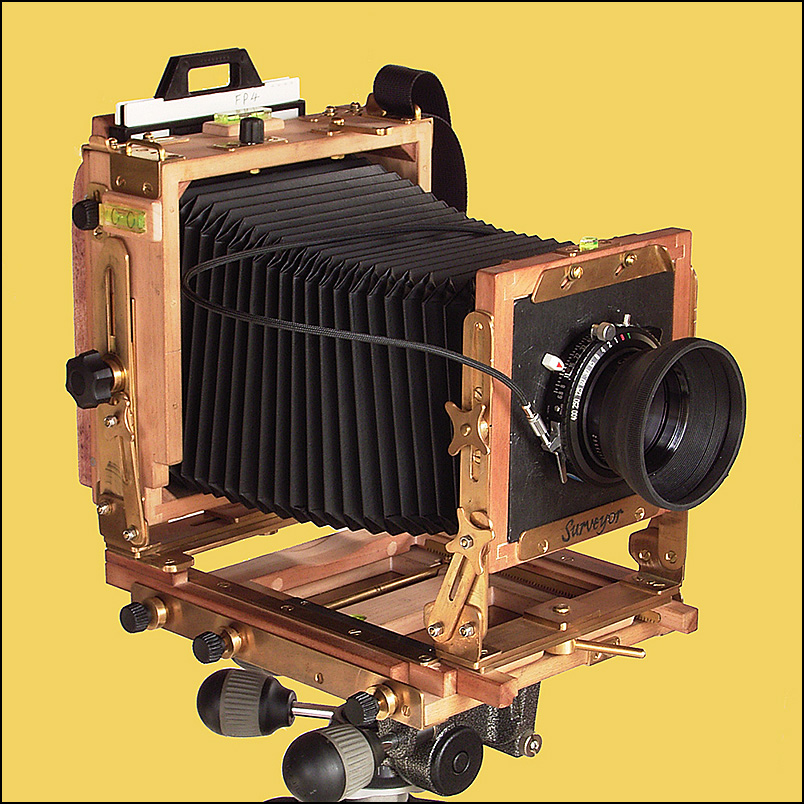
Cutting Teeth. Surveyor I 4x5. Lens: Zeiss Tessar, 135/4.5, c. 1930
In my view, this made for a more interesting image, an image that is worth taking the time to ‘read’ rather than simply glance over to absorb the content before moving on to the next.
It was also clear to me that older lenses like the 1930 Tessar and the Aldis triplet from 1910 still have a lot of mileage to them if properly exploited. These lenses are uncoated and need careful shading to maximise contrast but the tilts and swings of a view camera seem to amplify their capabilities.
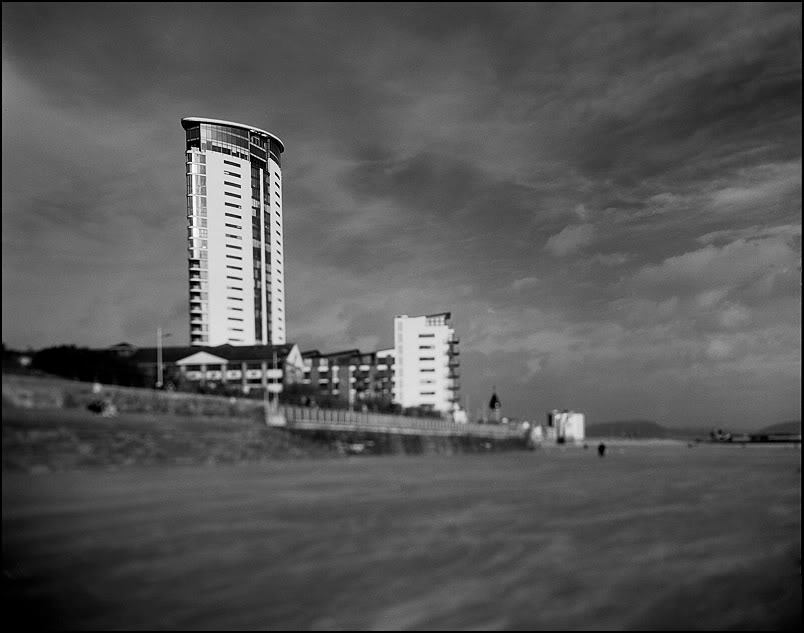
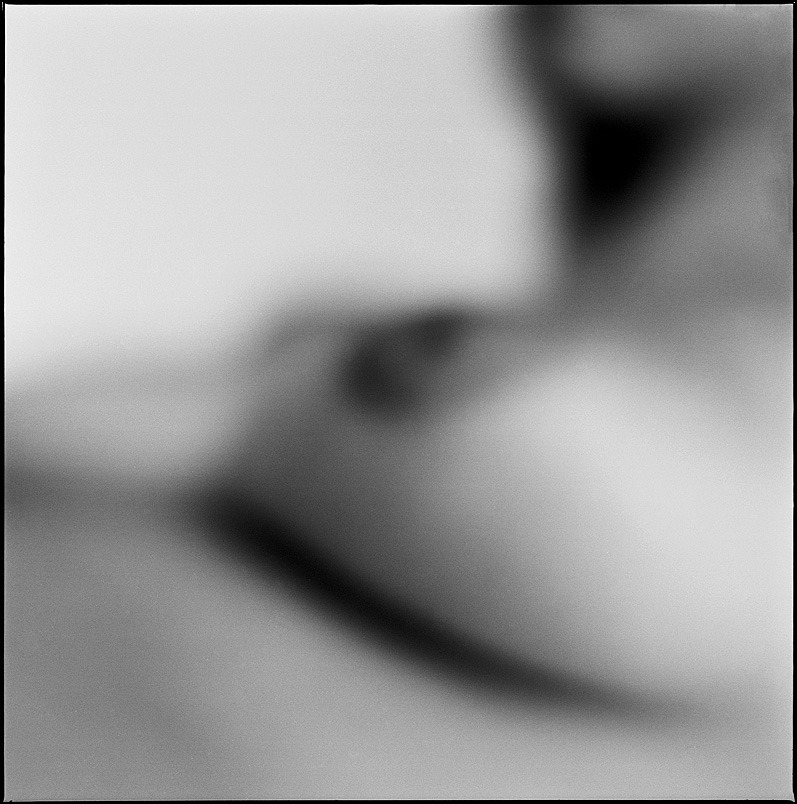
Meridian. Neretta Rail 4x5. Lens: Zeiss Tessar, 135/4.5, c. 1930
Debbie. Surveyor II 4x5. Lens: Aldis Plano, 150/6.8, c. 1910
Experimenting with different lenses was fun, but I figured it would be more practical to adapt medium format cameras than to continue using sheet film. I settled on using cameras and lenses in ways that were never intended and adapted two older 120 roll film cameras to take a meniscus lens, that is, a single element of glass. The rear element of a triplet lens seems well suited as the defocus effect is particularly striking; it is more extreme than say, the aberrations you get from a Holga or a Diana camera with the lens reversed.
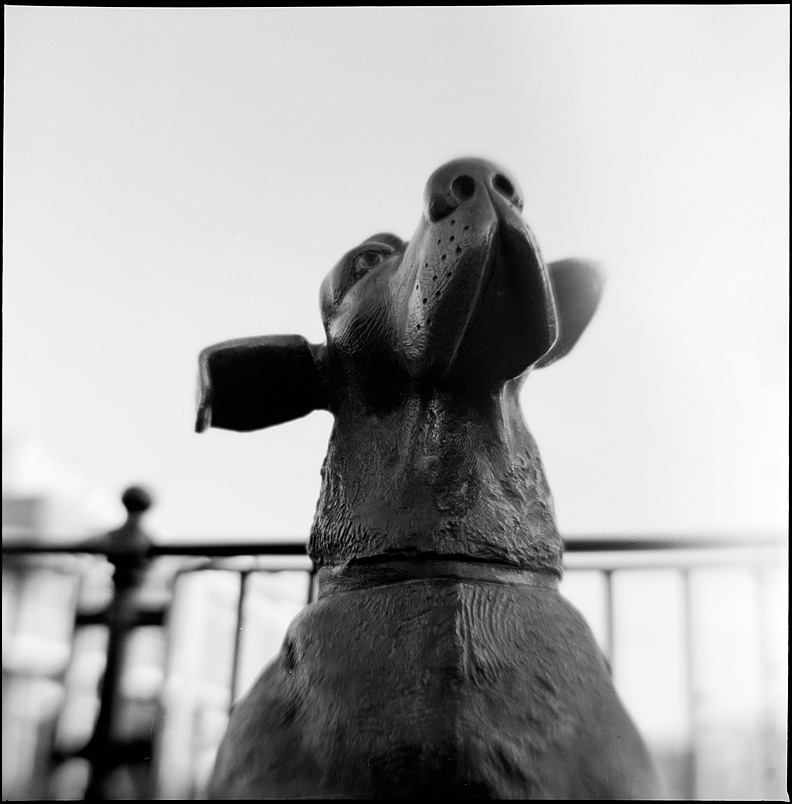
Patient Hound. Mamiya C3. Lens: Agfa Isolette Agnar rear element, 85/4.5, c. 1955
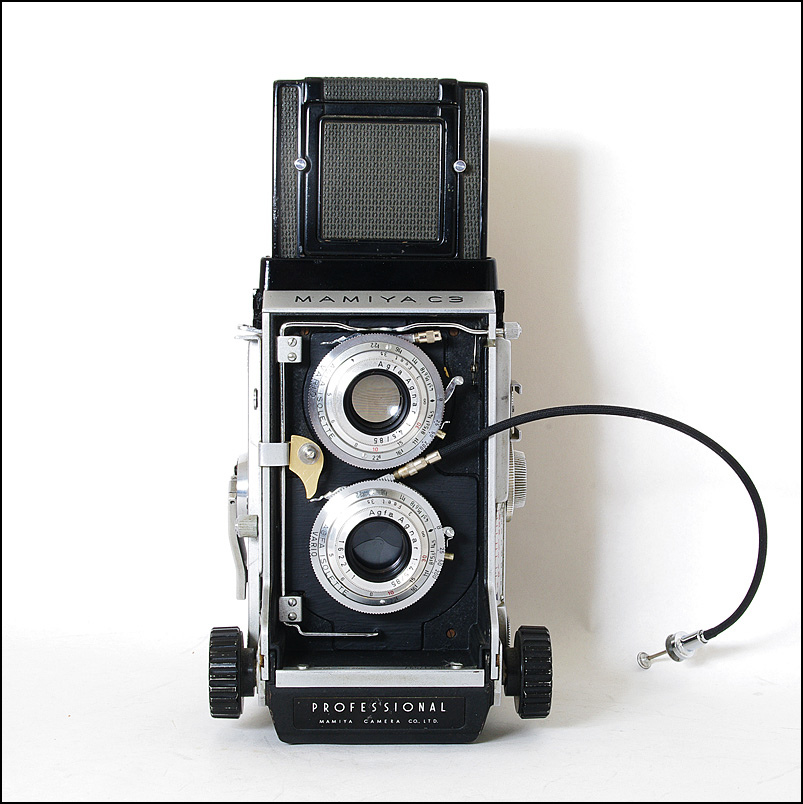
A Mamiya C3 from the early sixties turned out to be a suitable candidate for modification and good for all sorts of work because of the focusing bellows. However, a Twin Lens Reflex requires two identical lenses, one for viewing and focusing and the other for taking the shot. I used the shutters from two Agfa Isolette cameras with just the rear elements left in place as this allows you to focus on the far distance as easily as on a macro subject.
Flying Figurehead. Mamiya C3. Lens: Agfa Isolette Agnar rear element, 85/4.5, c. 1955
Having said that, at 1.8Kg the C3 is possibly more at home in a studio setting than traipsing around in a backpack. Handheld and close up, with the bellows fully racked out, the subject is rendered as patches of light and dark. Avoiding a clinical representation of the model, the distortion of the lens creates patterns of abstract form.
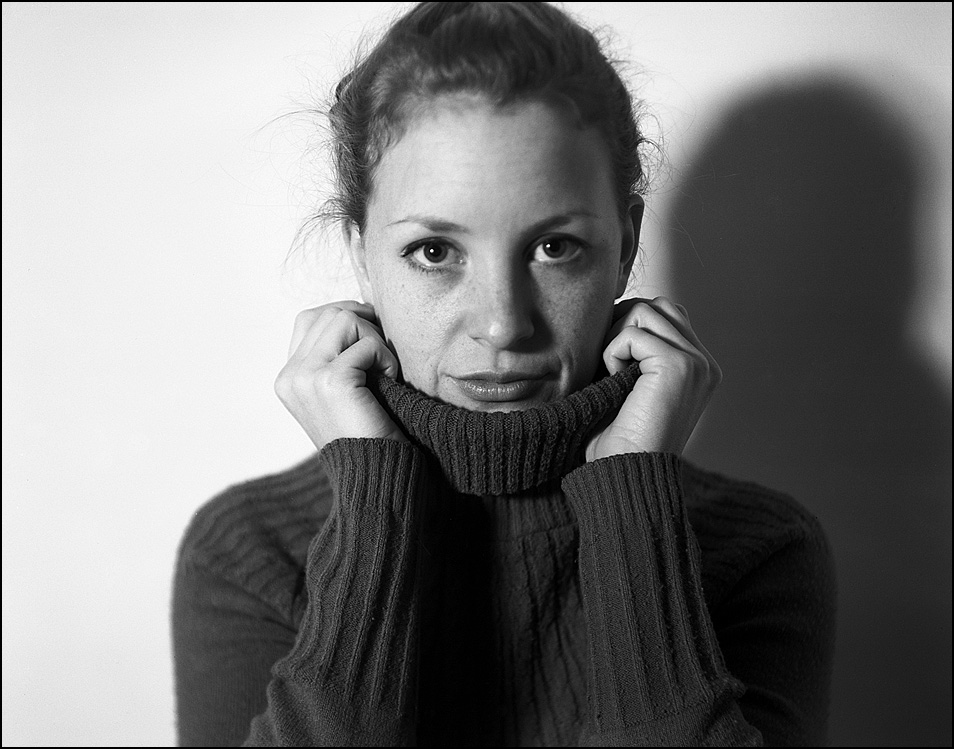
Becky. Mamiya C3. Lens: Agfa Isolette Agnar rear element, 85/4.5, c. 1955
Becky 2. Mamiya C3. Lens: Agfa Isolette Agnar rear element, 85/4.5, c. 1955
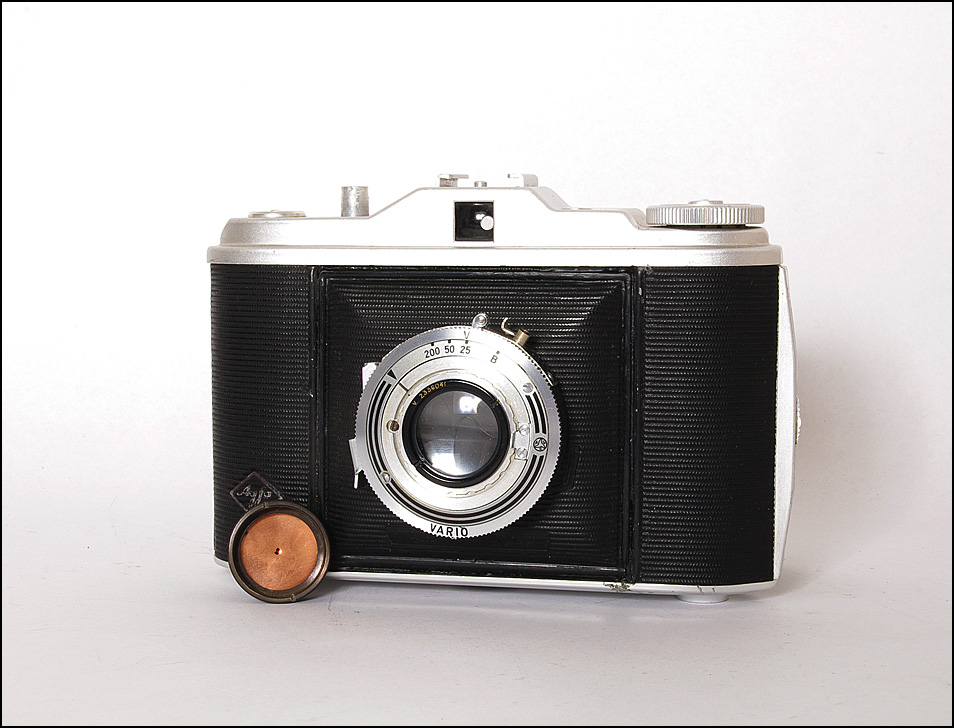
For travelling, a lighter camera may be more useful and a modified Isolette weighs just 400g. For the focal length I tried several rear elements before settling on one salvaged from a Voigtlander ‘Baby’ Bessa 66. This fits comfortably in the front of the shutter and gives a wider perspective than the TLR.
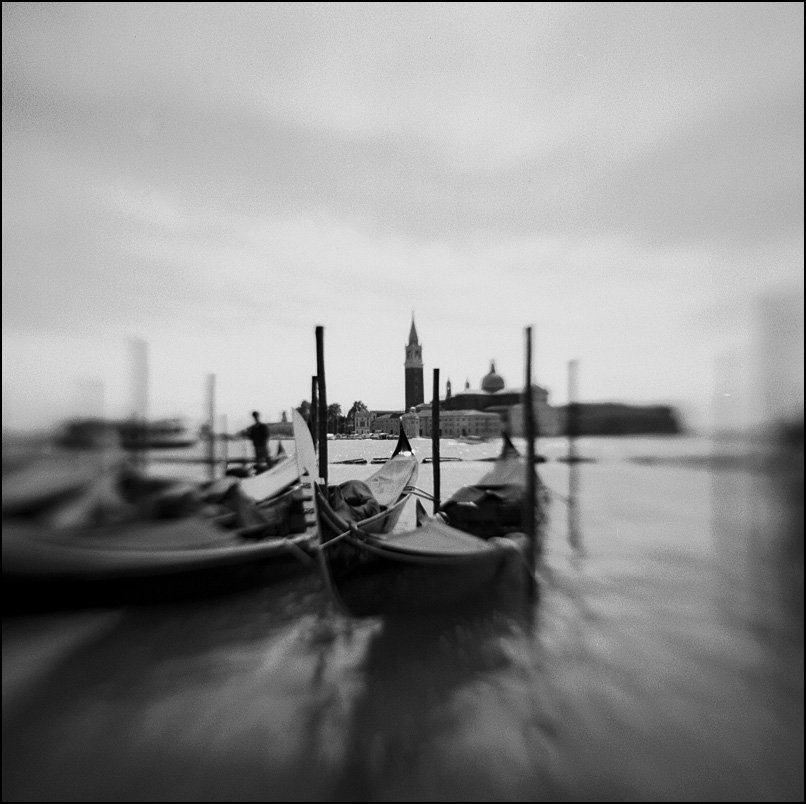
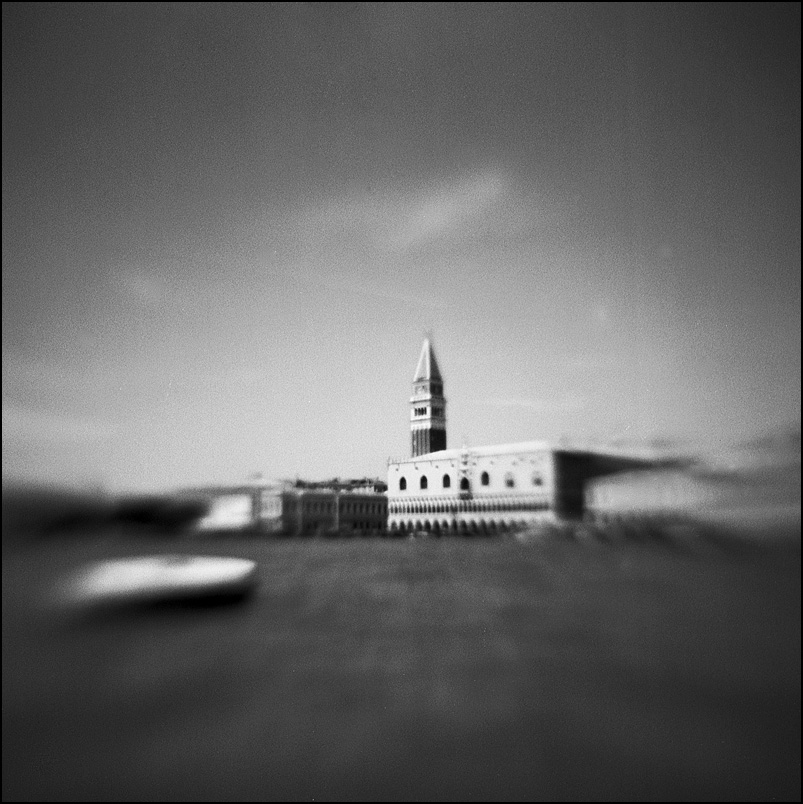
Gondolas at San Marco. Agfa Isolette. Lens: Voigtlander Bessa 66 Skopar rear element, 75/3.5 c. 1940
Representing the world in this aberrant way has an advantage over the killer-sharp resolution and contrast of today’s cameras in that it allows photographers to align their vision more closely to the memory or perception of the experience. The image has a life all its own rather than being a banal snapshot or mere reference to some place or event.
The Doge’s Palace. Agfa Isolette. Lens: Voigtlander ‘Baby’ Bessa Skopar rear element, 75/3.5 c. 1940
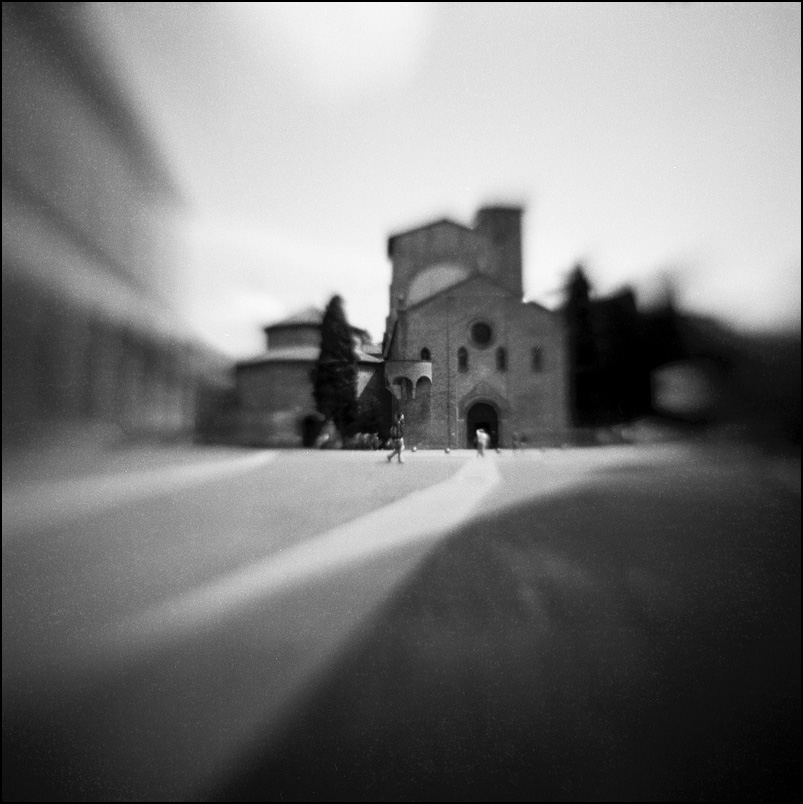
Santo Stefano. Agfa Isolette. Lens: Voigtlander ‘Baby’ Bessa Skopar rear element, 75/3.5 c. 1940
Instagram filters and those of other software programs may, (to paraphrase) be fast becoming a bourgeois concept, though such critiques are generally delivered by way of justification for whatever the observer finds appealing. But this is not, as some might suppose, harking back to an earlier period of a purer photography, rather it is occupying whatever conceptual space the photographer feels most comfortable with. In the end, it’s about being able to control the image with whatever tools and workflow provide the greatest satisfaction in use.
The Cameras
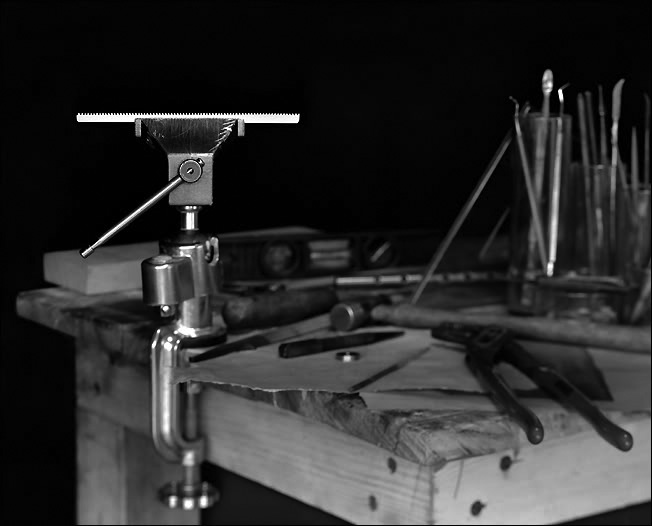
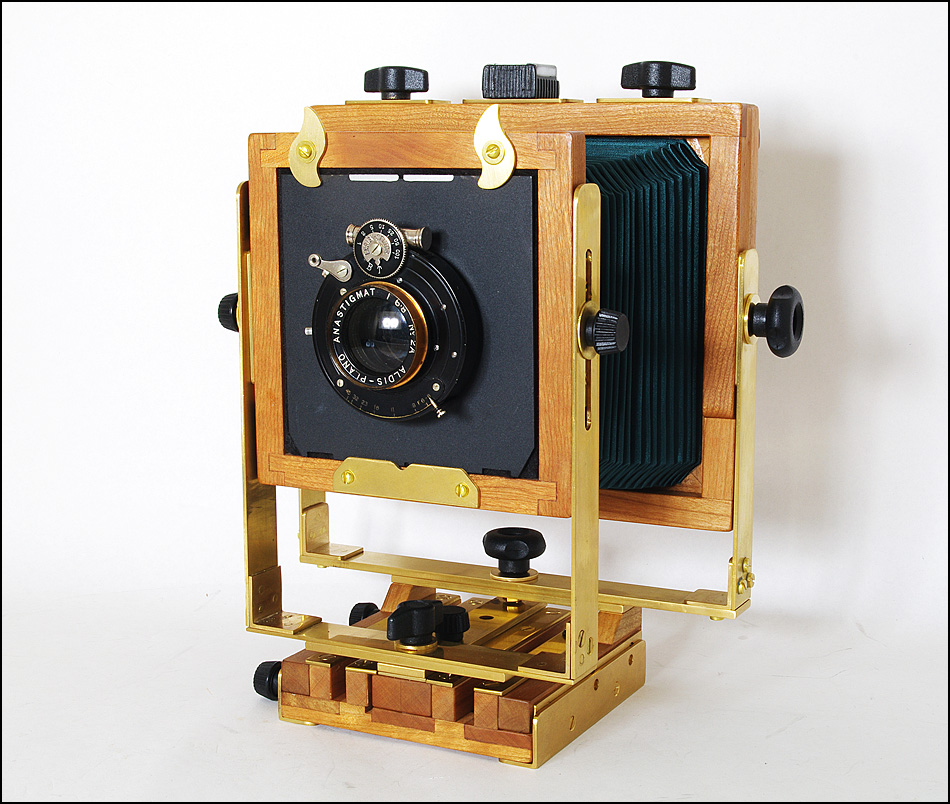
Lynch Surveyor I 4x5
Lynch Neretta Rail 4x5
Lynch Surveyor II 4x5
Mamiya C3 with adapted lens
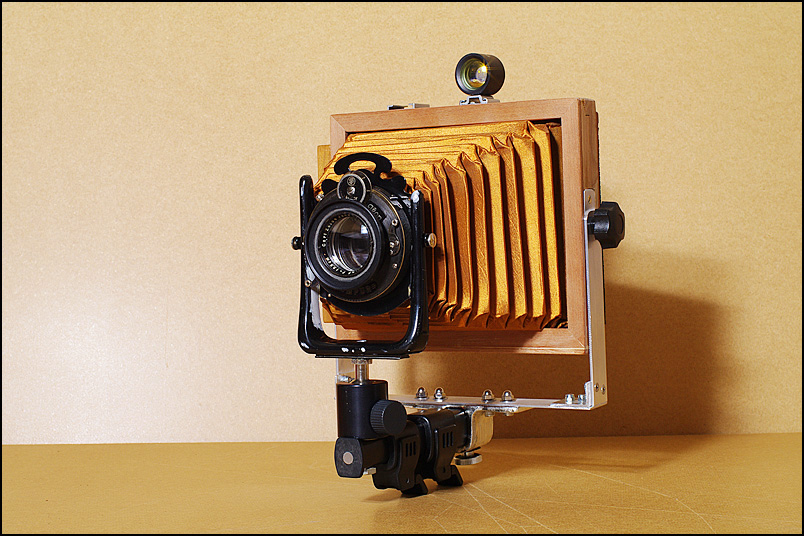
Agfa Isolette with adapted body and lens
First published 2014/08/14